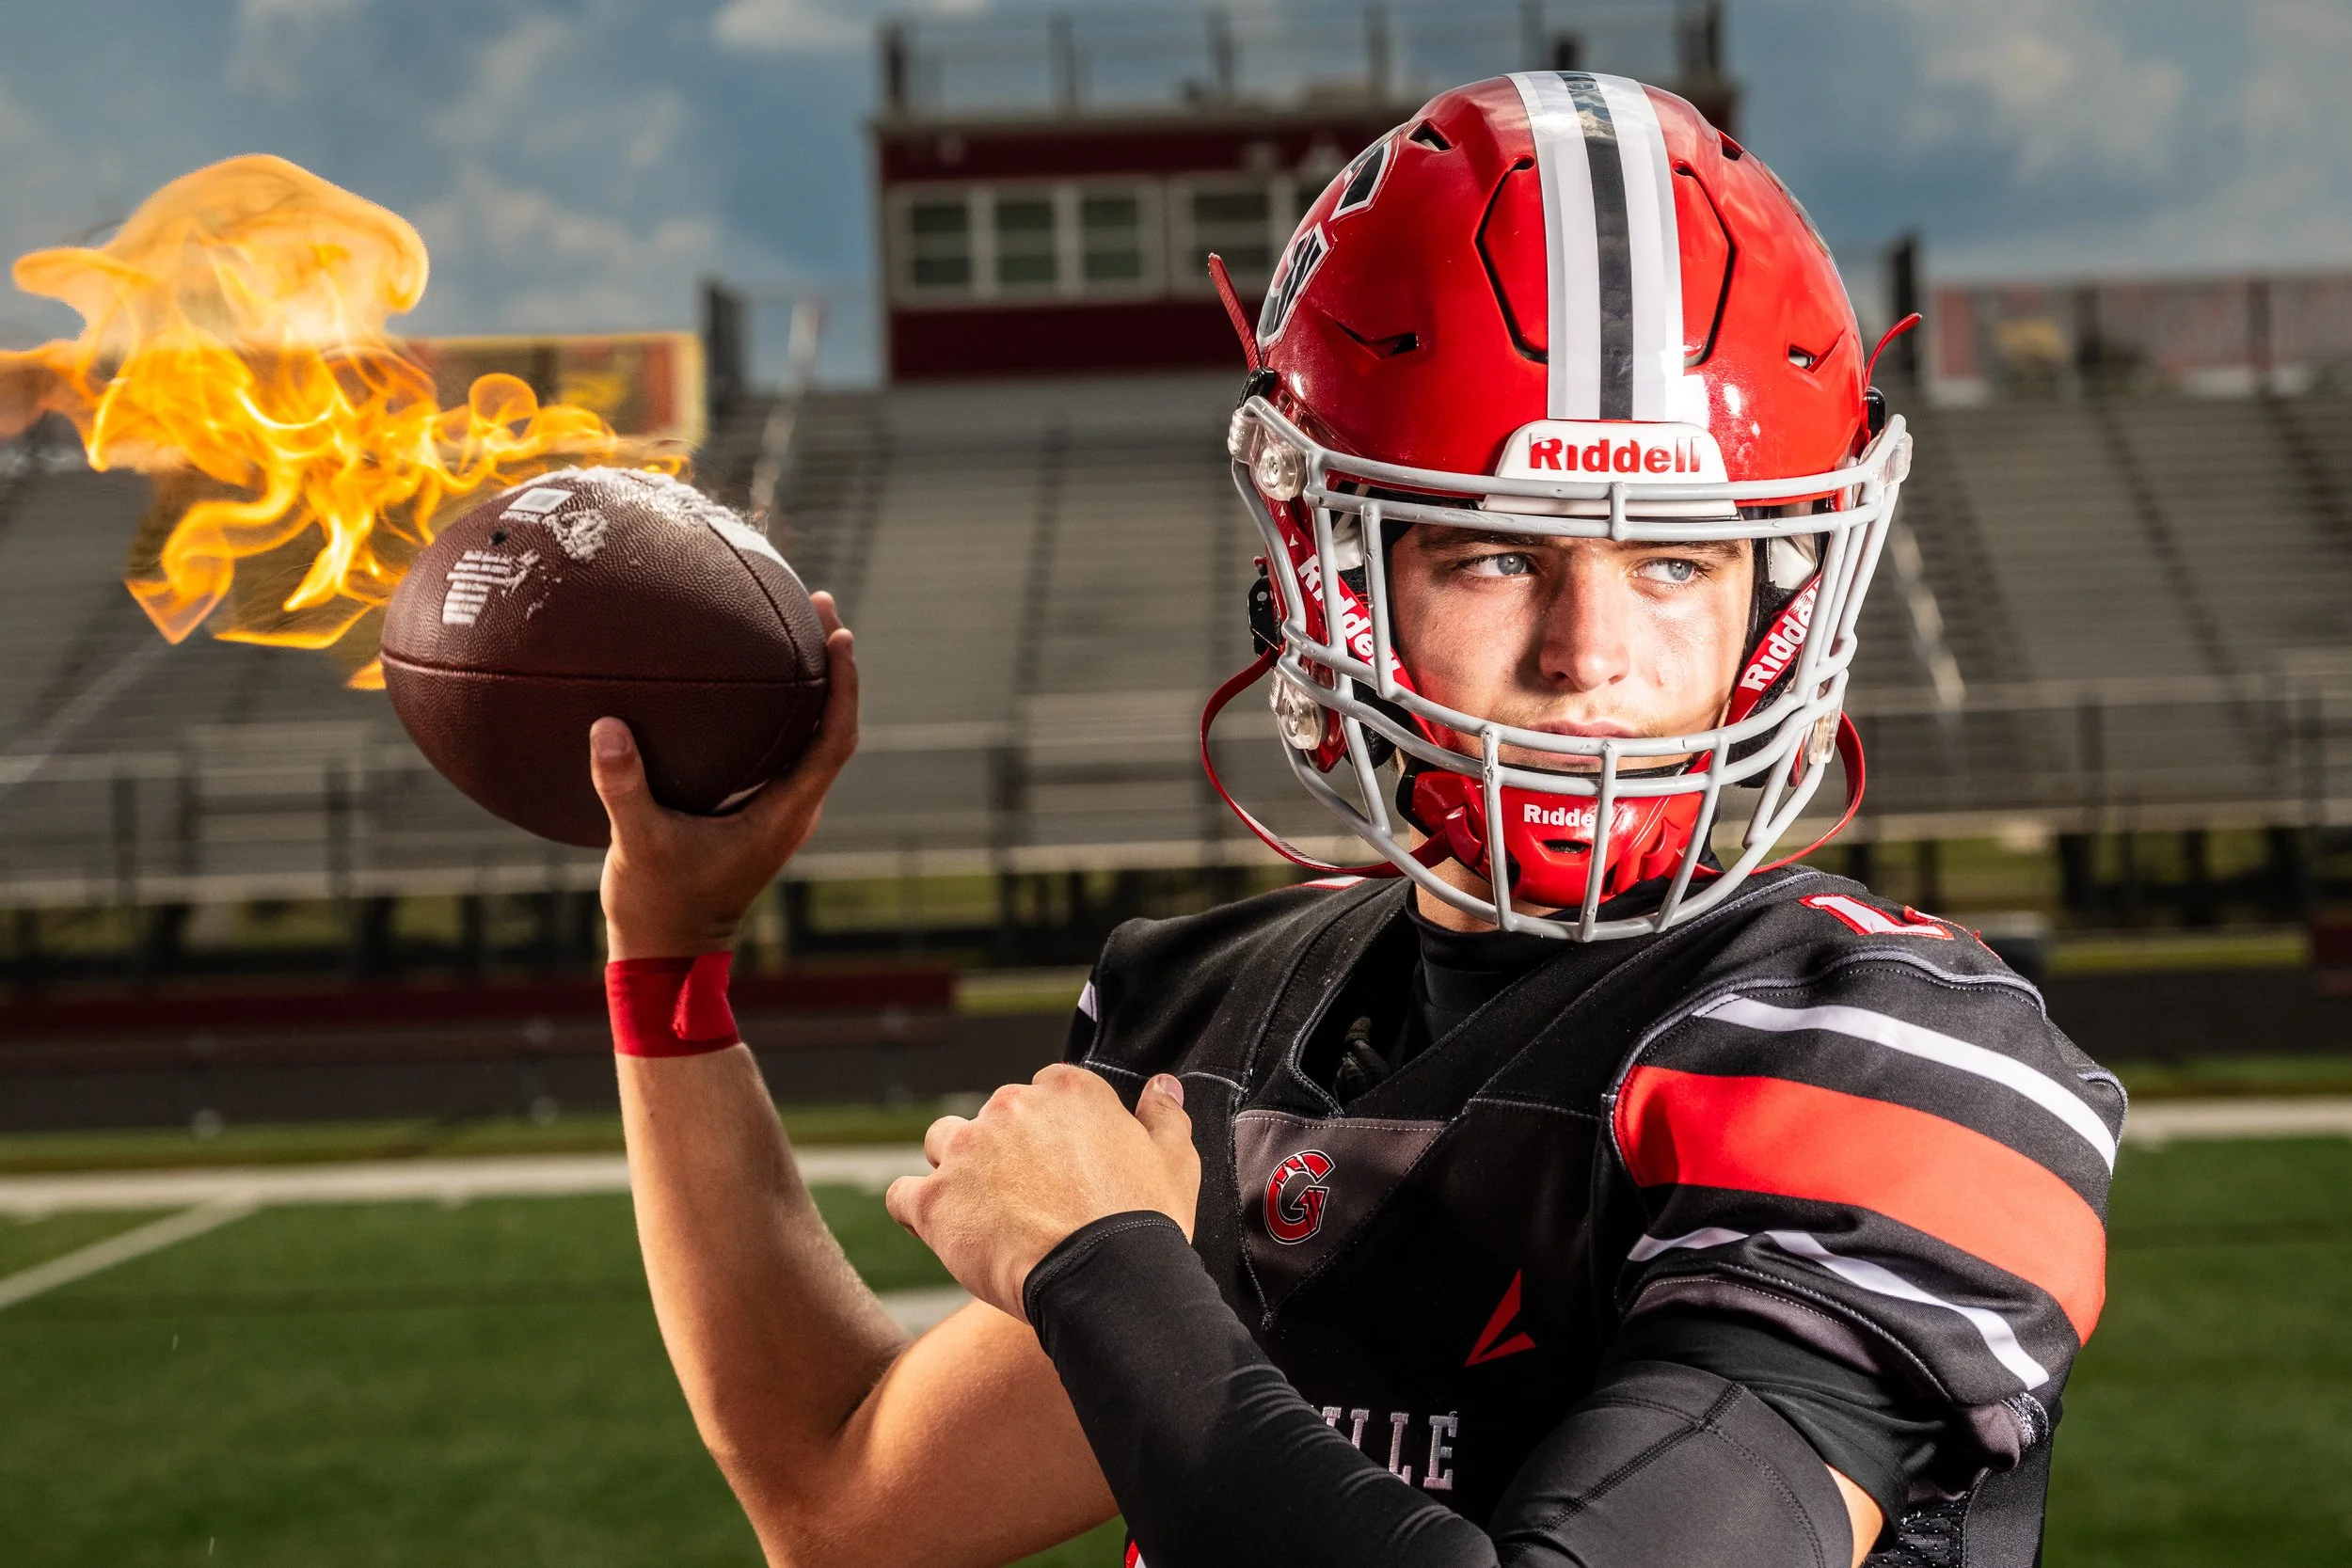
Cinematic Fire Portraits
Without Burning Down Your Studio
COMPANION VIDEOS
These Videos are to be used to help clarify the content of the Cinematic Fire Portraits guide
Photography guides are great for explaining concepts, camera settings, safety considerations, and workflow. Some parts of this technique, however, are much easier to understand when you can actually see them happening in real time. The companion videos included with this guide are designed to fill that gap.
Rather than repeating information already covered in the written material, these videos focus on the movement, timing, and rhythm involved in creating the effect. Watching the flame develop, seeing the pace of the shoot, and observing the coordination between photographer and assistant provides context that is difficult to capture in diagrams or screenshots alone.
Review the videos before your first attempt, then come back to them as needed while practicing the technique. A few minutes of observation can save a lot of trial and error once you're standing in the studio with a torch in one hand and a camera in the other.
Flame Lifecycle
One of the biggest challenges for photographers trying this technique for the first time is understanding how quickly the flame changes. The effect doesn't simply appear and disappear. It quickly evolves through several distinct stages, each producing a different look on camera.
This video walks through the complete lifecycle of a butane bubble flare, from ignition through peak intensity and eventual burnout. Pay close attention to the shape, brightness, and size of the flame at each stage. You'll notice that the most dramatic images are often created during a very specific portion of the burn, not necessarily at the moment of ignition.
Understanding these phases will help you anticipate the shot rather than react to it, improving both your timing and your consistency.
Shoot Rhythm & Assistant Workflow
Creating reliable fire images is rarely a one-person process. The most successful sessions develop a rhythm between photographer, assistant, and athlete. Everyone has a role, and the timing between those roles directly impacts the final image.
This behind-the-scenes video demonstrates the cadence used during a typical shoot. Watch how the assistant prepares the flare, how communication is handled, when the athlete begins their pose, and when the photograph is actually captured. Notice that the process becomes a predictable sequence rather than a chaotic rush.
The goal is not to copy the exact timing shown in the video, but to understand the flow of the session. Developing a consistent cadence improves safety, reduces stress, and dramatically increases the number of successful frames captured during each setup.